Wall frame art

A while ago I saw this great idea on Pinterest (our course) and just filed it in the back of my mind as something I thought Lily would like to do, but didn’t have any plans to do it immediately. Then one day a week or so ago Lil wanted to draw and so I grabbed a length of easel paper off of the easel and taped it to the wall. I very crudely drew a few frames for Lil and handed her the marker/crayon/colored pencil box and away she went.

First fram wall

Waldo came in while she was drawing in the frames and sat with her while I worked a little.  After she was done he told me what it hit it was and to be sure to do it again. I was more than happy too.

Lily drawing in her frames

This time she drew little people in the frames rather then amoebas.  This kept her busy for almost an hour.

Person with a furry belly

It's a person with a furry belly, of course.

Howling Man

This one is a howling man. See his "O-ing" mouth?

This was a very easy craft to set up and Lily loved it. I’d give it a 6 out of 10 crayon rating.

Easter 2012 ~ Just a bit late

I know that I’m late with this Easter post, but I don’t really care. If this actually gets published and doesn’t live the rest of the its existence in my drafts folder I will be one very happy woman.

Last year we had started out dying eggs for Easter, but very quickly we realized that red solo cups of dye are boring and spill very easily (I’m pretty sure I spilled two cups) so I tossed all of the colored vinegar water and changed tactics. I got out our painting supplies and we painted eggs. It worked out great so a tradition was born.  This year I wanted some pastel colors for the eggs and had a very hard time trying to find pastel paint. Finally I found some little pots of pastel-ish colors at Michaels and decided that they would have to be good enough.

The Saturday before Easter Waldo, Lily and I sat down and started painting eggs.  First I had Lil paint her 2012 wood egg.  This is a idea I stole from my friend Amy, I love it. This way I’ll have an egg for every year when she’s all grown up.

Painting easter eggs

Painting easter eggs

I love how every stoke of the paintbrush was very deliberate.

Painting easter eggs

After her wood egg was done we all got going with the regular hard-boiled eggs.

Painting easter eggs

Painting easter eggs

I love how the paint pots looked after a little painting.

Painting easter eggs

Painting easter eggs

Painting easter eggs

Painting easter eggs

Easter morning I hid the eggs in the front yard and Lily had a lot of fun searching for them. Once and halfway through she got cold so I put a sweater over her cute new outfit.

Easter 2012

Easter 2012

We don’t celebrate Easter other than to hide and seek eggs over and over and over and over again. For us it was the perfect day.

Lily and the homemade puffy paint

In a land very near a Mommy wanted to do something to entertain her Small Girl and remembered seeing a Pin for homemade puffy paint. So the Mommy set forth and mixed up the concoction.  The Small Girl picked the colors from Mommy’s new package of pretty food colorings.  Mommy put them in some squeeze bottles and they set off to round up the necessary craft items.

Homemade puffy paint art

This was my attempt at using a ‘white board’ type background. Lil was too anxious to paint to let me take pictures of her paint.

Homemade puffy paint art

*Notice the Spring sticky wall behind Lil?  It’s been added to quite a bit since it was first put up.

Homemade puffy paint art

Homemade puffy paint art

Homemade puffy paint art

Homemade puffy paint art

Homemade puffy paint art

They dried really hard and still puffy. It was a fun craft and I’m sure we’ll do it again although next time I’m going to thin it down just a little, Lil had to squeeze pretty hard to get the paint out. It ended up being a collaborative effort and the resulting pictures were neat.

Puffy Paint- 1 c salt, c flour, 1 c water, food coloring

I put it all in a bowl except for the food coloring.  Once it was mixed well I separated a little out to a second bowl and put some in a storage container since I only had two bottles to work with. I then stirred the color in and moved it to the squeeze bottles.  Since I’m going to thin it down next time I might be able to just mix the food coloring straight in the squeeze bottles, but this time I was glad I had the bowl and spoon to work with.

I’m linking up with Nanette‘s Pinteractive post. Be sure to check her out.

Nannersp

When Kitchen Gadgets are lemons, Make Lemonaid

I have a few recipes in my repertoire that require me to stand at the stove whisking a sauce or whatever for up to an hour or more.  It is tiring and boring work, but luckily the results are worth it in the end.  To make my life easier for these food items Waldo kept telling me he was going to buy me one of those self-stirring as-seen-on-TV things.  We were walking around Fred Meyers one day and found the stirrer thing on the shelf for like $5.00.  We tossed it in the cart and decided to make something with it the next week that would use it.  I ended up making a tomato sauce and put the stirrer to the test.  It flunked! It flunked like a frat boy that hasn’t been to class all semester and drank his brains out.  It hardly moved around the pan and after about 7 minutes I took it out and finished stirring the sauce myself.

I knew this thing was never going to be used in the kitchen again so I decided to see what kind painting instrument it would make.

I started out by dropping globs of paint on a paper in a open cardboard box*.

Painting with a auto stir gadget

Lil put the stirrer in the box and we turned it on.

Painting with a auto stir gadget

It did the same thing in the box that it did in my sauce pan. It drifted to one corner and stayed there. I showed Lil how she could gently move it around.

Painting with a auto stir gadget

I was pretty impressed with how the first one turned out, even if Lily’s paint choice wasn’t my favorite.

Homemade puffy paint art

I didn’t like how all the paint got corralled in the middle because of the sweeper arm so I cut it off. I figured this thing was never going to by used for sauce so I didn’t need it.

Painting with a auto stir gadget

* I use this box for a lot of different art and painting projects. It’s just a little bigger than 8×11, so paper fits great. Sometimes I use a little tape on the underside of the paper to keep it down, but it’s usually not necessary. It contains messes nicely, however marbles will still fly out of given enough shaking.

Painting with a auto stir gadget

Painting with a auto stir gadget

Painting with a auto stir gadget

I cleaned the feet of the stirrer between every painting so the colors were clean.

Painting with a auto stir gadget

The little stirrer vibrated crazy fast and the way the colors mixed was a surprise to me. I really like how these last turned out. They are the newest addition to the art wall.

Homemade puffy paint art

My phone doesn’t do the colors justice.

Homemade puffy paint art

I was so excited about this project, I thought Lil would love it, but sometimes you just can’t tell with her which way she’s going to go with something.  So I so so relieved when she loved it. We give Robo-stir painting a 7 out of 10 crayon review. 🙂

Sticky walls for Spring and Easter

I found the idea to use contact paper (sticky side out) on a table on Pinterest and Lily loved it. I have since tried it on the wall and Lily loves it even more.

I had thought at first to buy Lil some pattern blocks because I saw on some blog that her kids had fun with it, but keep putting off actually buying them. One day I decided to see if Lily would even like it and took some craft foam sheets that I had bought but didn’t really have a use for and cut it into different shapes. Lil went crazy for it.

Sticky wall

Since she like doing abstract shapes so much I thought I’d try using the craft foam to celebrate the seasons and holidays.

First up: Spring.

While Lil was downstairs playing with Waldo’s parents I started cutting foam sheets up into flowers and a sun and some clouds.  Lil walked in and saw the stack of foam sheets and went straight to the drawer where I keep my exacto knife (well covered so the sharp end isn’t a danger) grabbed it and the cutting board it came with and proclaimed I needed to make her more shapes.  First off I have to say that I didn’t know she even knew my knife was in the drawer of my craft dresser-thing and I’ve since moved it and secondly holy crap I guess she liked the sticky board even more than I though.

Spring sticky wall

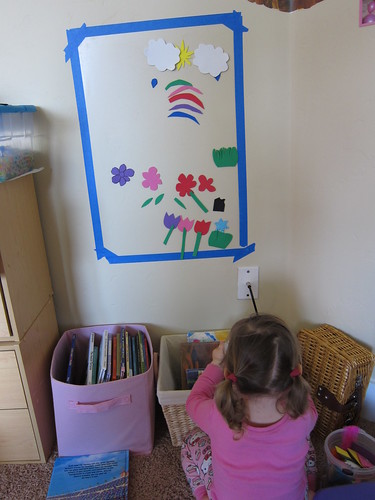
I showed her what I had already made her and asked what else she needed. Lily decided that we needed some red and orange clouds, a tree (which I thought was an awesome idea and couldn’t believe I hadn’t thought of it), a bird (see ‘a tree’), a butterfly and a snowflake (from a pre-cut winter foam sheet set we had).

Spring sticky wall

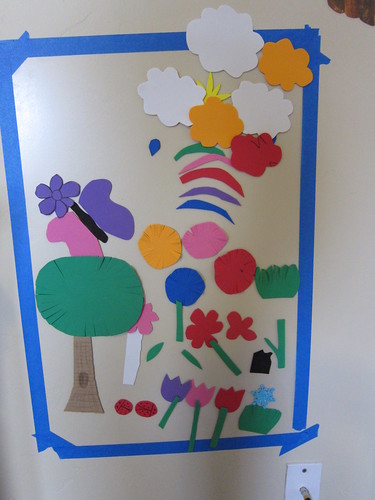
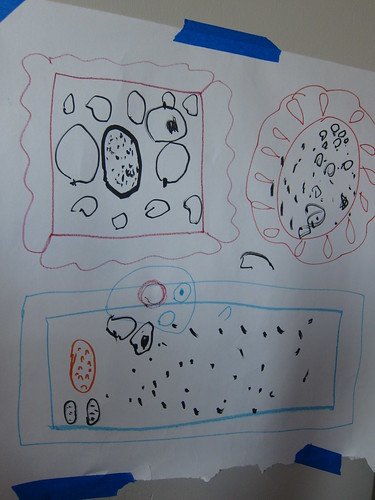
The spring board was a huge hit and is still up on the wall.

*****

Second sticky board: Easter bunnies.

We aren’t religious people and do a very secular version of Christmas and Easter. It’s all about family, fun, crafts and being together. That’s just so you know why there are never any crosses in my art with Lily. 🙂

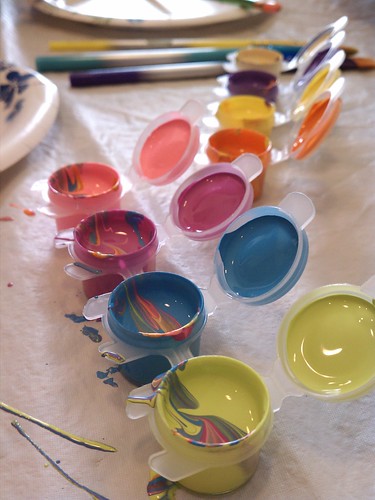
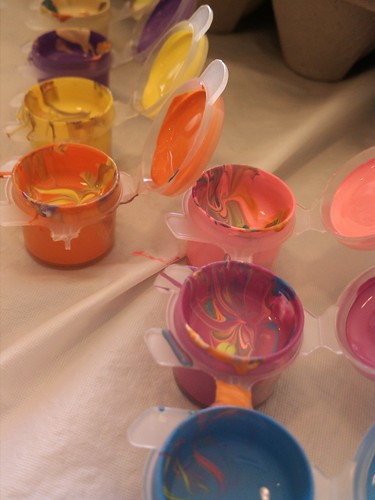
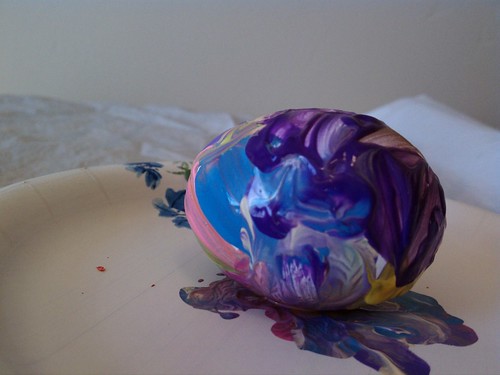
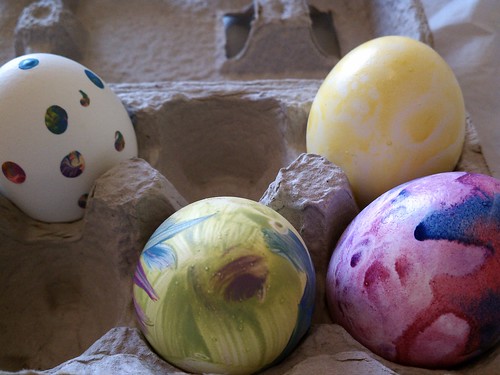
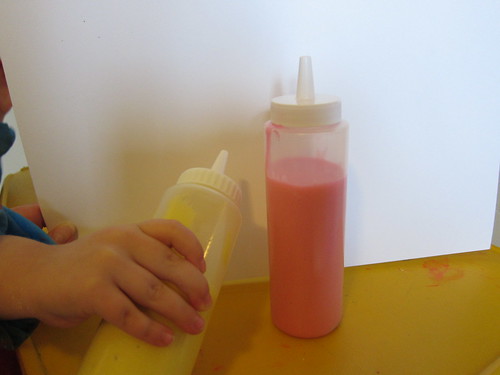
We stopped at Michaels last weekend so I could grab some pastel paint for our eggs. Let me just point out here that I found it very hard to get pastel paint anywhere, do you have a secret place you get it from? Anyway we were looking around and I grabbed some foam sheets cut like eggs and I figured I’d do another sticky wall with them or a mobile or something. I also grabbed a spring colored collection of foam sheets. The more I thought of the foam eggs the clearer a craft idea became. Of course in the end it only barely resembled the grand plan in my brain, but it was fun none the less.

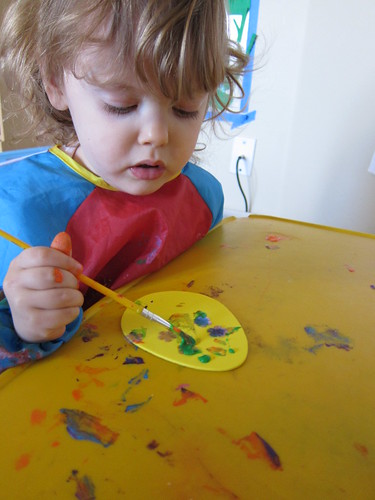
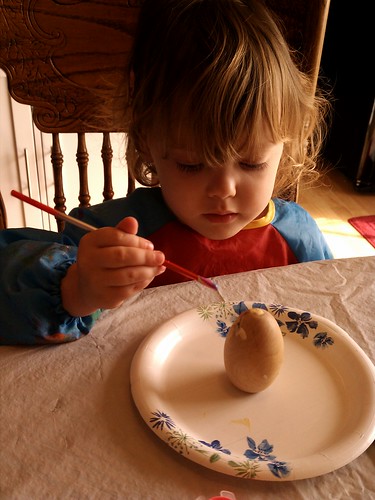
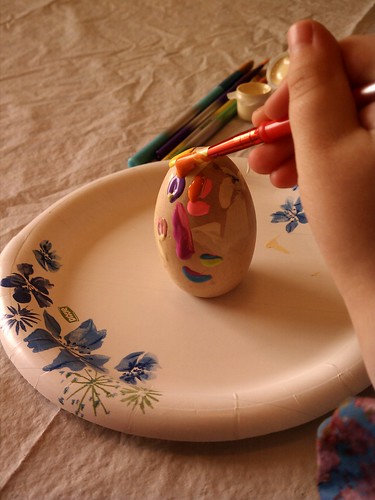
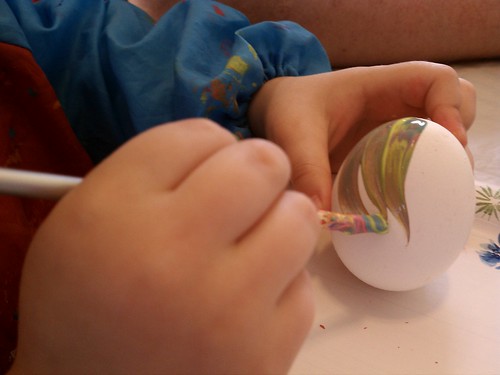
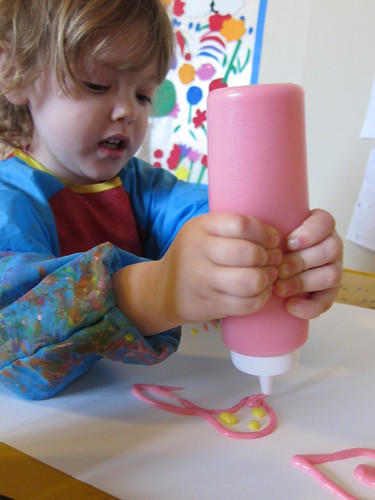
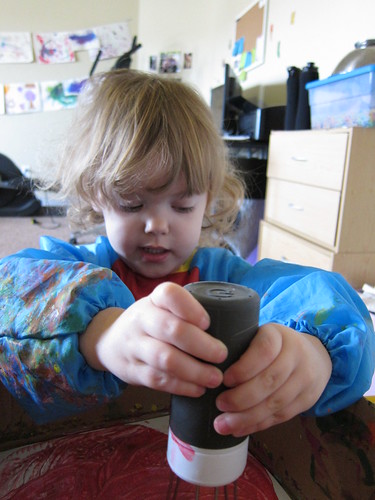
Thursday I gave Lily the foam eggs and some puffy paint since she loved it so much last time and she went to town.

Decorating foam eggs for the sticky wall

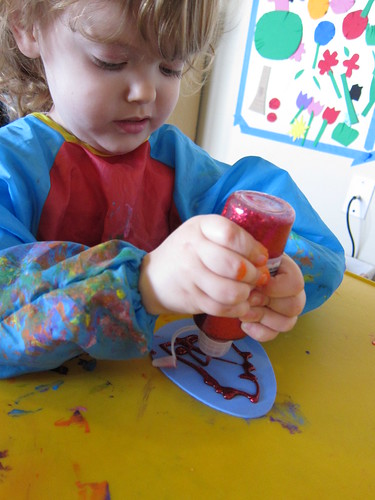
I showed her how to make lines, she was one happy girl after that.

Decorating foam eggs for the sticky wall

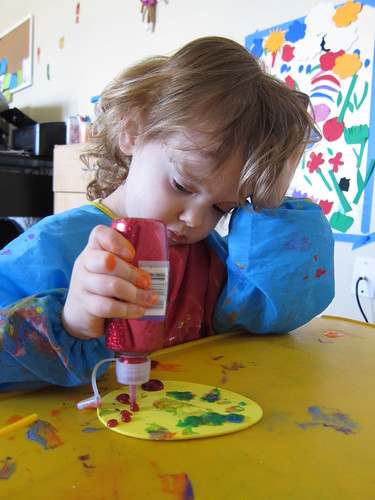
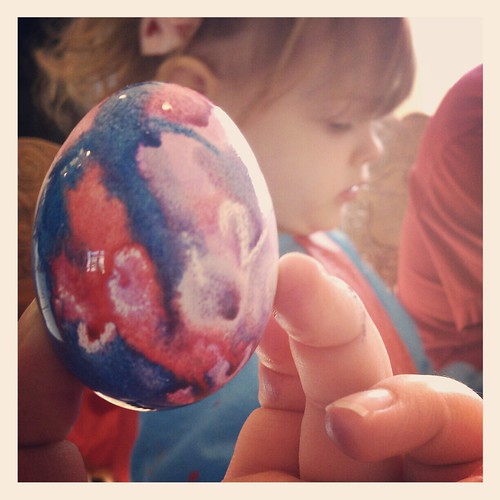
I know she looks really bored, but I checked and she's just concentrating.

Decorating foam eggs for the sticky wall

Decorating foam eggs for the sticky wall

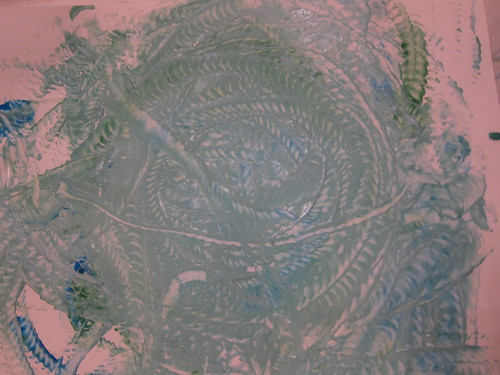
The green is just craft glue that I added some green dye to for fun.

Decorating foam eggs for the sticky wall

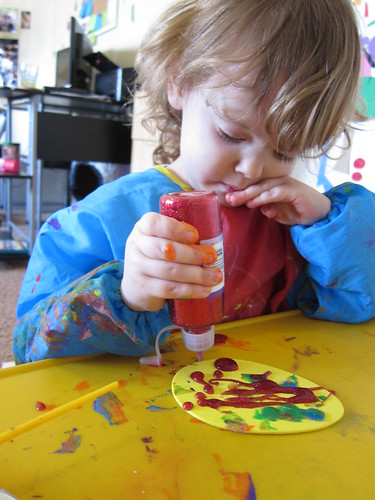
I wasn’t sure how long the huge globs of puffy paint was going to take to dry so I planned to do the rest of the sticky wall on Saturday instead of Friday.  I’m really glad I did, the largest globs weren’t dry till Saturday morning.

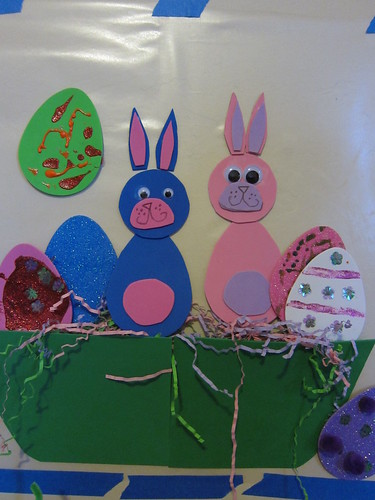
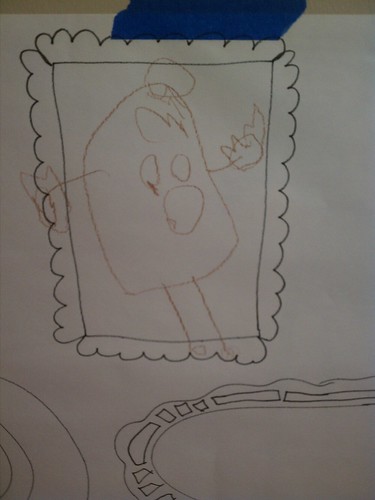
After I put Lily to bed Friday night I started getting everything ready for Saturday morning.  I put a new piece of contact paper up on a free space of wall (I’m running out of free wall space in the family room very quickly) and figured out how to make a very simple basket. I normally would let Lily put everything up on the sticky wall, but I wanted a few things “just so” on this particular wall so I did a few of the items.

Bunny sticky wall

I put a little easter grass in the basket and set to work on making my bunnies.  I honestly had no idea how I was going to make them when I started looking around the family room for inspiration.  I initially thought they’d be pretty small, but ended up using one of the foam eggs as a template for the belly portion so they are bigger than the eggs and that worked out just fine, thankfully.  After cutting two body portions out of craft foam I grabbed one of Lil’s tiny tea cups and used it to trace a circle for the head. I free-handed the ears and then decided that they needed some additional dimension and added a little almost round piece to the belly, a muzzle on the face and inner ear colors. I loved my little bunnies. I took them in and showed Waldo, who tried really hard to not roll his eyes too much.  I then decided they needed arms and legs and this was almost the end of my cute bunnies.  The arms and legs got very cartoonish and long and at first I hated it, but Lil ended up using only the arms and it worked out great. I know that I’m the only one that the arms and legs being weird would bother, but I worked hard on my little buddies bunnies and wanted perfection.

Bunnys for the sticky wall

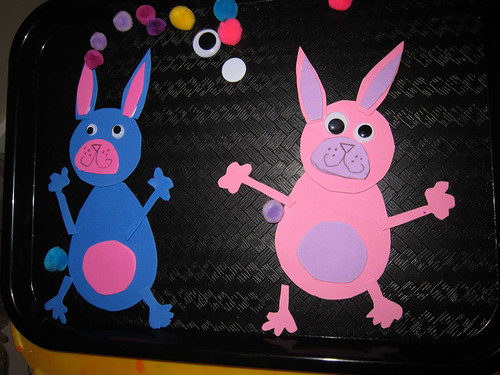
I put the bunny parts together and just placed the eyes on the tray so Lil would be able to see what they were, but would be able to customize.  I shouldn’t have been surprised that she put them all together just about exactly how I had them laid out. I mean Mr. Potato Head has only one suitable configuration, oh well.  I stayed up very late to get my bunnies all finished and make sure everything was ready for when Lil woke up in the morning.  I find it funny that most Mom’s would stay up late on Saturday night to make it look like the Easter bunny had been busy with baskets and eggs for Easter. I stay up late Friday night so that Lil can do a fun easter craft instead.

Saturday morning bright and early Lil woke up and we started our day.  She didn’t disappoint me with her reaction to my bunny craft.  We spent a little time gluing the eyes on and then she got to work.

Bunny sticky wall

Bunny sticky wall

I love that she used poof balls for feet, unfortunately poof balls don't stick to contact paper very well.

The bunnies got moved around a bit before Lil was totally satisfied, but once she was it was all perfect.

Bunny sticky wall

Bunny sticky wall

I love making sticky walls for Lily with craft foam shapes and other items we find around the house and craft closet.  She has a lot of fun with it and learns along the way too.  Most of the time the foam sheets are repositionable, but sometimes they get totally stuck and you can’t move it without ripping.  Such is life I guess and we all move on.  I have a sticky wall idea that’s forming involving fish, I can’t wait to see how it works out.

Related Posts Plugin for WordPress, Blogger...Pin It